Add Clip Art
One of the most useful features in “PowerPoint” is the ability to add “Clipart” and other pictures to your “Presentation”.
“PowerPoint” provides us with a “Clip Art Gallery” where we find hundreds of images.
If we did not find what we are looking for in this gallery, we can still use other “Clipart” or insert pictures.
“PowerPoint” can also import video clips and music, but we focus on “Clipart” in this lesson.
We will talk about music, video and Flash in a later lesson.
We can add an image to a “Slide” in “Normal view” (“Normal View“) or in “Slide View”(“SlideView“).
We can add as many images as we wish.
When we already selected a “Placeholder” in our “Slide“, PowerPoint will automatically place the image there.
If we do not have a “Placeholder” in our “Slide”, “PowerPoint” will place the image in the middle.
We can insert “ClipArt” by clicking “Insert” from the menu bar, clicking “Picture” and selecting “ClipArt”.
In ’97 and 2000 versions of “PowerPoint”, this opens the “Clip Art Gallery”, where we select a category from which we can choose “ClipArt”.
In 2000 we also have the ability to search for clips.
In 2003 and XP, we click on the “Clip Art” icon when we have a “Placeholder” in our “Slides”.

This opens a pop-up window with all available clips on our computer.
And I mean from all the locations.
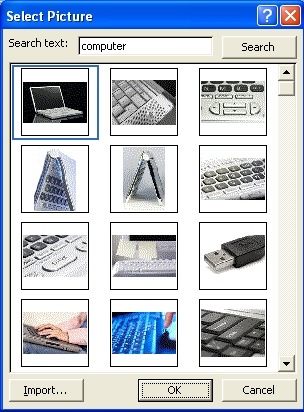
We wish to find some specifice images, we type a keyword in the box at the top of the window, and click “Search”.
We select the image and clicking the OK button to import the image in our “Slide”.
In XP or 2003 we would click on “Insert” – “Picture” – “Clip Art” in the menu bar.
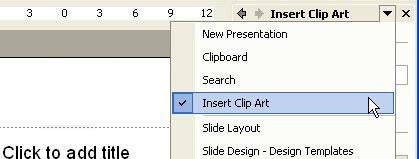
There is also a possibility to add “ClipArt” from “Tasks Panel” where we see “Clip Art (2003)” or “Insert Clip Art (XP)”.
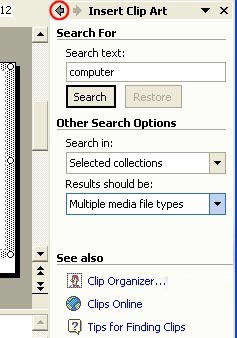
In this Panel, we can also enter a search function.
To return to the previous “Tasks panel” we click on the left pointing arrow at the top of the “Tasks Panel”.
If you have a picture on your computer, such as eg the company logo, and you want to import it into a show, then click “Insert” – “Picture” – “From File ..” the menu bar.
This opens the “Insert Picture” dialog box where you select the folder where you have placed the logo, and then double-click on the logo to import it.
Changing Clip Art Scale
We change the size of an image in the same way that we have changed the size of a text box.
We select the clip, click and drag the boxes or circles that appear, depending on the version you work with, to the desired size.
Insert Fill Colors and Borders in Clip Art
We add fill colors and borders to our clip art in the same way as we do for text boxes.
To do this we first select our “Clip Art” and click on “Format” – “Picture” in the “Toolbar“.
This opens the “Format Picture” dialog box, where we click the “Colors and Lines” tab option.
Indicate your preferences for both the fill color as well as the edges.
If you do not know how, this has already been explained in Lesson 5.
Moving a Clip Art
The simplest way of moving a “Clip Art” is by clicking and dragging to the position you want.
You can also use the arrow keys on your keyboard.
Copy, cut, paste and delete a Clip Art
We copy, cut and paste a “Clip Art” by first selecting and then clicking on
“Copy”  (When we want to retain the original) or “Cut”
  (When we do not want to retain the original), in the “Standard toolbar”.
Then we open the “Slide” to where we want to copy and click “Paste”  .
.
To delete a “Clip Art” we select the “Clip Art” and click the “Delete” button on our keyboard.
The Picture toolbar
In “PowerPoint”, we have 2 tools that we can use to edit clip art.
The first is the “Picture Toolbar”.

 Insert new image
 color setting
 more contrast
 less contrast
 more exposure
 less exposure
 crop (crop)
 Rotate left (only XP and 2003)
 line style
 image compression (only XP and 2003)
This is actually done only with images that are distributed over the Internet, for a slideshow on the computer has little use.
 recoloring clip art
 opens the Format Picture dialog box
 make image transparent
 back to original image format
The second possibility is the “Format Picture” dialog box:
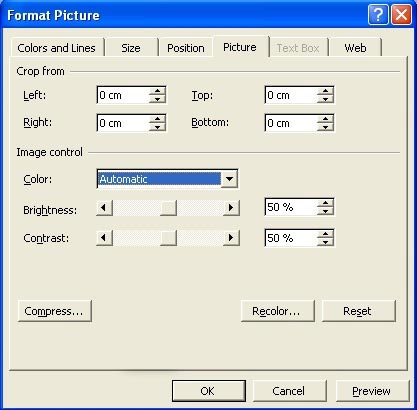
In this dialog we have the opportunity of cutting (cropping) images, changing brightness and contrast, we can actually do these things with our “Picture toolbar”, but the nice thing here is “Recolor” button.
When we click on it, we can give different colors to all parts of the “Clip Art”.
Cropping Clip Art (cropping)
When we want to remove certain parts of our “Clip Art” we can click on the “Crop” button in our “Picture toolbar”.
Or we use the “Format Picture” dialog box, where we enter left, right, top and bottom settings.
And click OK.
Compress Pictures (2003 and XP)
In “PowerPoint” 2003 and XP we can reduce the size of our image (in kb) by clicking on the “Compress Picture” button” .
This opens the “Compress Pictures” dialog box:
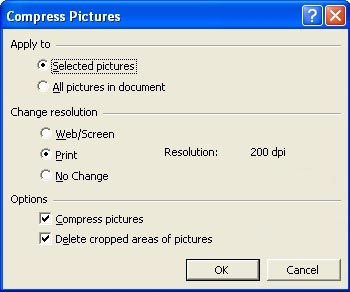
In this dialog we have three sections:
In the first section we choose whether we want to compress all our images, or only the selected ones.
In the second section, we choose the resolution for our images, to use on the internet, or for printing.
For printing, the resolution should be much higher to obtain a good result.
For internet, the resolution should not be too high, otherwise it will take a long time to load.
And in the third section, we have two checkboxes: 1. “Compress pictures” and 2. “delete croppeed areas of pictures”.
Enter your settings and click OK.
Add Clips to the Clip Art Gallery
In 2000 and ’97 versions of “PowerPoint”, we click on “Insert” – “Picture” – “Clip Art …” in the menu bar.
In the “Clip Art Gallery”, click “Import Clips” button.
This opens the “Add Clip” to “Clip Art Gallery” dialog box, where we navigate to the “Clip Art” that we want to add from our directory.
Then we select the clip and make a choice:
“Copy into Clip Gallery”, “Move into Clip Gallery” or “Let Clip Gallery find this clip in its current folder or volume” in the “Clip import option” section of the dialog.
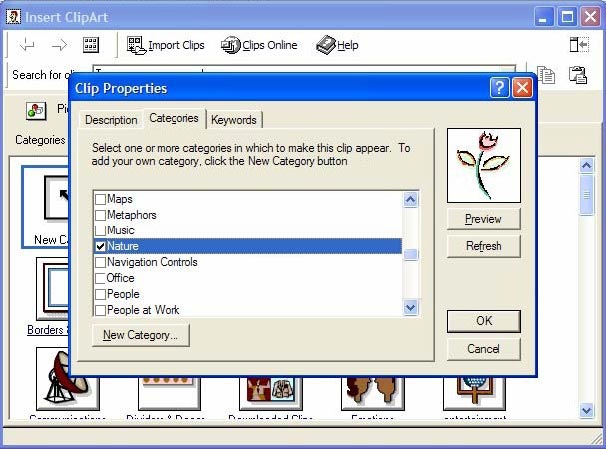
We click on “Import” and it opens “Clip Properties”dialog box.
In “Desciption” tab we give a description of our clip.
In the “Categories” tab, we can select the category from which we want to add the clip.
In the “Keywords” tab, we can enter some keywords, which we can later search for this clip.
When we are done, we click on OK.
Then we close the “Clip Art Gallery”.
For versions 2003 and XP, we proceed as follows:
We open the “Tasks Panel”, “Clip Art” (2003) or “Insert Clip Art” (XP).
At the bottom of the “Tasks Panel”, click “Organize clips …” (2003) or “Clip Organizer …” (XP) to open the “Clip
Organizer” window.
We select the window on the left of the folder where we want to save the file.
We click “File” – “Add Clips to Organizer” – “On My Own ..” in the “Clip Organizer” window.
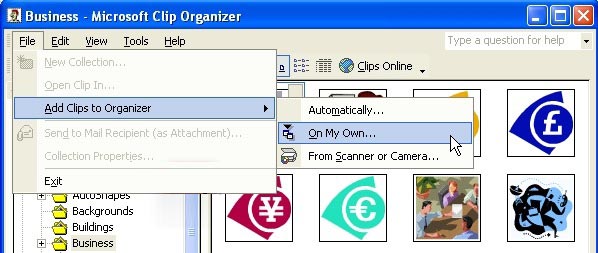
When the “Add Clips to Organizer” dialog box opens, we select the clip (s), and click “Add” (
Add
“).
Find Clips online
When we open “Clip Gallery” (version 2000 and ’97) or “Clip Organizer” (version 2003 and XP), we can click on “Clips Online” to connect to the “Microsoft” website and download clips.
In the “Clip Gallery” dialog box, we find this button at the top.
The 2003 and XP versions, we find a link at the bottom of the “Tasks Panel”.
When we have downloaded the clips, we can use them like any other clip art.
Using the Clip Organizer (2003 and XP)
The “Clip Organizer” in version 2003 and XP is a property that allows us to categorize our clips and store in a
similar way as in the “Clip Art Gallery.”
We have already seen how we add “ClipArt”, but we can also add “Keywords” and “Categories”.
Once we have added the clip, we select the clip, and click the arrow that appears next to the picture.
In the dropdown menu we can add “Keywords” by selecting the keywords.
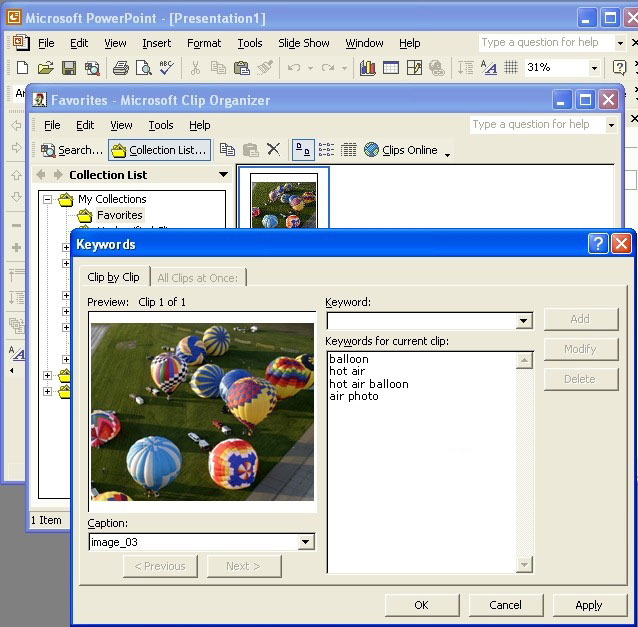
Or we can choose “Move to Collection …” or “Copy to Collection …” , to move or copy to another folder.
In the dialog that appears, we choose one of these two choices and we select the collection that we want to move or copy.
We can also create a new collection in this window when we click the “New” button.


