We will discuss examples where we work with masks of the [Grayscale Intensity-] type. This can be done with photographs, videos and a gradient. It is advisable to use material such as photos and videos with a lot of contrast. These give the best results when used as a mask of this type.
In the first two examples we just use photos as a mask.
New show
- Create a new show titled [Show 41_Grayscale Masks]. Click [File]> [New Show] and change the [Show Title], and retain the [Aspect Ratio] at 4:3. Click on [Create].
Example 1
Photos such as layers and scales
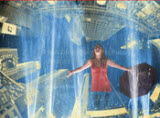
- Select the “Water Fountain” and “City Lights” photos from Lesson 41. Drag them to the slide list, but as layers.
- We set the [Scaling] to [Fill Frame]. Right click on the slide and select [Customize Slide]> [Scale Slide Image]> [Fill Frame].
Organizing Layers
- Double-click the slide and select Layers> Layer Settings.
Notice that the layer sequence is, [City Lights] and below this you have [Water Fountain].
If this is not so, place them in that order.
Zoom and positioning
- The layer, [Water Fountain], is slightly modified: [Zoom] = 130% and [Position] = 9 x -18.5.
Mask
- The layer, [City Lights] is our mask. Select it and select the [Masking Layer] checkbox Normally, ProShow selects the type, [Intensity (Grayscale)].
- When we close this window we do not get the desired effect. We open the [Slide Options] window once again and we click the [Invert] key in the [Masking Layer] section. Close this window once again and you will see the right result.
Scaling and organizing Additional layers
- As a bonus, we’ll still take a 3rd photo and set the required options. Select the photo “Background_009” and
 drag it to the slide as an extra layer.
 - Double-click the slide and in [Layer]> [Layer Settings] set the [Scaling] to [Fill Frame]. We place this layer below all the other layers. And, we will not link this layer to the mask. Now click [OK] and then you have an example of what is possible with a [Grayscale] type mask.
Example 2
The second example also deals with pictures.
Scaling and zooming Photos as layers,
- Select “Baby” and “Glass” from Lesson 41. Drag them as layers to the 2nd slide.
- For these two pictures also we set the [Scaling] to [Fill Frame]. Right click on the slide and select [Customize Slide]> [Scale Slide Image]> [Fill Frame].
- Double-click the slide and select [Layers]> [Layer Settings] and for the layer [Baby], set the [Zoom] to 140%.
Organizing Layers
- The layer order should be: [Baby], [Glass]. If not, put them in that order.
Mask
- We now use the layer, [Baby], as a mask layer. Select the [Masking Layer] checkbox and check if the
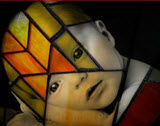 [Intensity (Grayscale)] type is selected in [Mask type].
 - Click [OK] and the baby is precisely placed behind this special window.
Not only photos but videos also can be used as a mask. Here are 2 examples.
Example 3
Video and photos as layers
- Select the mpg “video text” and the picture “Background_07” and drag them to slide 3 as layers.
Scaling Layers
- We set the [Scaling] to [Fill Frame]. Right click on the slide and select [Customize Slide]> [Scale Slide Image]> [Fill Frame].
Organizing Layers
- Double-click the slide and select [Layers]> [Layer Settings]. The layers order should be: [Text video] and [Background_07]. If not, put the layers in this order.
Mask
- We use the [Text Video] layer use as a mask. Select the [Masking Layer] check box and check that the [Intensity (Grayscale)] type has been selected as the [Mask type].
Exit and adjusting the duration
- Click [OK] to close everything and change the [duration] of this slide
 to 10 sec. If this is set you can see the letters ‘THE END’ in the background.
Example 4
Another example of a video as a mask.
Videos and photos as layers
- Select the mpg “Moving clouds” and the pictures “Background_02” and “Power” and drag them to slide 4 as layers.
Scaling Layers
- For all of them we set the [Scaling] to [Fill Frame]. Right click on the slide and select [Customize Slide]> [Scale Slide Image]> [Fill Frame].
Organizing Layers
- Double-click the slide and select [Layers]> [Layer Settings]. The layer order should be: [Moving clouds], followed by [Background_02] and [Power]. If not, put the layers in this order.
Mask
- We are going to use the layer, [Moving clouds], as a mask layer. Select [Masking Layer] and check that the [Mask type] is set to [Intensity (Grayscale)].
Close and adjusting duration
- Click [OK] to close everything and change the [duration] of this slide to 7 sec. If you play this, you will see the
 effect of moving clouds.
You can use gradients in combination with photographs to create beautiful masks. Here also we have two examples.
Example 5
Inserting and Scaling Photos
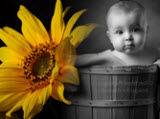
- Select the photos “Baby in a tub” and “Golden Flower” and drag them to slide 5 as layers.
- We select [Fill Frame] as the [Scaling] option.
Organizing Layers
- Double-click the slide and select [Layers]> [Layer Settings]. The order of layers should be: [Golden Flower] and [Baby in a tub]. If not, put the layers in this order.
Zooming and placing Layers
- These 2 pictures are moved a little. We first specify the following settings for the layers. For the layer [Golden Flower] the [Position] is -18.5 x 0 and for the layer [Baby in a tub], the [Zoom] is set at 120% and the [Position] = 23 x 0.
Flipping layers
- We also want to see the baby from another angle. Select [Layer]> [Editing] and in [Editing Tools] we flip the picture [Baby in a tub] horizontally.
Smooth transition
- What we want is the middle of this slide is a kind of smooth transition from one picture to another. For this we use a new layer. Return to [Layer Settings] and create a new layer (use the [+] icon and select [Add Gradient] from the popup menu. We want a gradient with white and black hues. These are best to use because they give a very good contrast. The following figure shows the setting that we use.
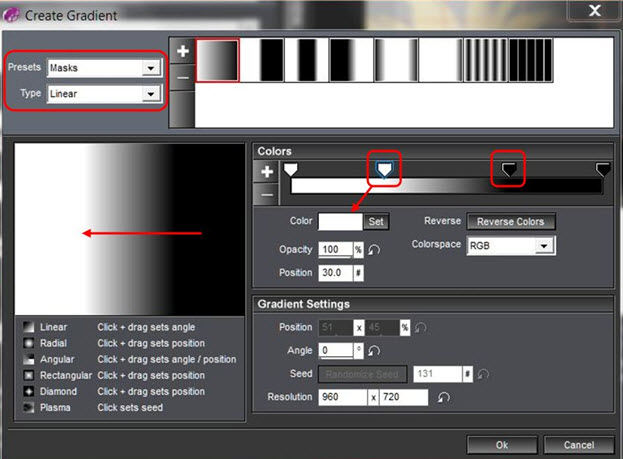
We select [Masks] in the drop-down menu, [Presets]. In [type] we select [Linear]. To get the colors horizontally click in the color window and draw a horizontal line. We want more white along the left and more black on the right. Drag the appropriate button, White gradient [Position] = 30 and the black gradient to [Position] = 70. On one side we have a lot of white and a lot of black on the other. For this type of mask the white portion of the underlying layer is displayed and the black portion blocked. Click [OK] and then check whether this layer is on top. If not, correct it.
Mask
- We make the [Gradient 1] layer as a mask layer. Select [Masking Layer] and select [Intensity (Grayscale)] as
 the [Mask type].
 - Click [OK] to close everything and you’re done
Example 6
Here’s another example of a gradient as a mask.
Photos as layers and scales
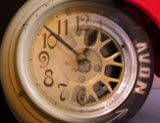
- Select the photos “Wall Clock” and “Car Wheel” and drag them to slide 6 as layers.
- We set the [Scaling] to [Fill Frame] for both the layers.
Organizing Layers
- Double-click the slide and select [Layers]> [Layer Settings]. The order of layers should be: [Clock] and [Auto Wheel]. If not, put the layers in this order.
Inserting an Additional gradient layer
- As in the previous example we will use the same layer settings. Create a new layer (plus sign) and select [Add Gradient]. We need to have a similar gradient as the one in the previous example but with the [White] now placed at [Position] = 40 and [Black] at [Position] = 60. Click [OK] and check whether [Gradient 1] is the topmost layer. If not, correct it.
Mask
- We set the [Gradient 1] layer as the mask layer. Select [Masking Layer] and check whether the [Mask type] selected is [Intensity (Grayscale)].
- Click [OK] and see the result.
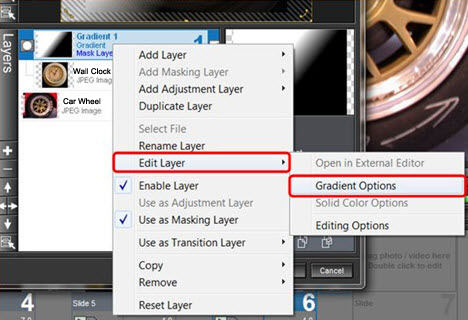
Experimenting with the gradient
- You can now experiment and adjust the gradient in the mask. You can do this by right clicking the layer and then selecting [Edit Layer]> [Gradient Options].
These were a some examples of [Grayscale Masks]. While using this type of mask it is important to remember: “Black hides and White shows”
Saving the Show
- Save this project now. Click [File]> [Save As] and select the correct folder in which you want to save this project using the explorer and change the [Name] if necessary. Click [Save].


