In this lesson, we are going to create a complex effect that combines layers, keyframes, while using a time-saving proposition. The goal is to work with posters on different layers so that they are displayed one by one with eacch poster sliding in, over the previous one. We will work with 1 slide in which we have multiple layers and multiple keyframes per layer.
New show
- Create a new show titled “Show 49_Posters”. Click [File]> [New Show] change the [Show Title], and retain the [Aspect Ratio] at 4:3. Click [Create].
Blank slide
- We start by inserting a blank slide. Right click on the slide list, and select [Insert]> [Blank Slide].
Gray background
- We want a gray background. Double-click the slide and select [Slide]> [Background]. Select [Background Type] and select the radio button, [Solid Color]. Click [Set] and select gray as the color, from the color wheel, i.e, RGB = 154/154/154. Click [OK] to close this window.
Adjusting the Slide duration and transition time
- The slide time is set at 24 sec and the transition time is set at 0 sec. Setting the transition time to 0 sec makes it easier for us to work with the keyframes. The [Keyframe Timeline] contains both the slide and transition durations.
Dragging and adjusting Photos
- Select the picture, “Poster1” from Lesson 49. Drag it as an extra layer to the slide list.
- We ar going to reduce the [Zoom] level of the [Poster] to 40%. Double-click the slide and select [Layers]> [Layer Settings] and set the [Zoom] to 40. We also provide a border and a shadow. Select [Layers]> [Editing]. Select the [Outline] box, and set the color with the color wheel to white and set the [Size] to the maximum, i.e, 5. Also select [Drop Shadow] and set the [Opacity] to 100%.
Additional keyframes
- Analyzing the required action, we find a total of 7 keyframes, necessary. There are 2 available per layer as per the standard. So we need to create 5 of them, here. Select [Effects]> [Motion Effects]. As we have seen earlier, you can add keyframes in various ways. Here we use the [+] icon. We click on it 5 times. The positions of these keyframes is not important.
Positioning Keyframes
- We want the time zones between the keyframes to be 4 sec. The placement is done, on the timeline, as follows. [Keyframe 6] is set to a 20 sec. You do this by right clicking on [Keyframe 6], selecting [Set Time for this Keyframe], setting the time to 20 and clicking [OK]. [Keyframe 5] is placed at 16 sec, [Keyframe 4] at 12 sec, [Keyframe 3] at 8 sec and [Keyframe 2] at 4 sec.
Duplicate layers with all settings intact
- These settings of both the layer, zoom, etc.., As the keyframe format we use is identical to the 4 other posters. We can do this by repeating everything like we did for poster1. But fortunately there is a shorter way to achieve this. Go to [Layer]> [Layer Settings] and duplicate the layer [Poster1]. Right-click the layer and select [Duplicate layer]. Do this 3 times, so we have a total of 5 layers available.
Replacing Photos
- Now it is time to select the correct poster. We’re g
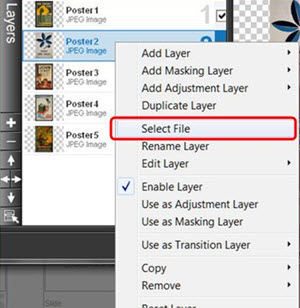 oing to put them in order as implied by the side heading. Select [Layer 2], right click and select [Select File]. The explorer then selects “Poster2” from Lesson 49.
Thus [Poster1] replaced by [Poster2]. Do the same thing for layers 3 and 4. Another way to do this, is to select “Poster5” from Lesson 49 and drag it to [Layer 5] and place it in the middle.
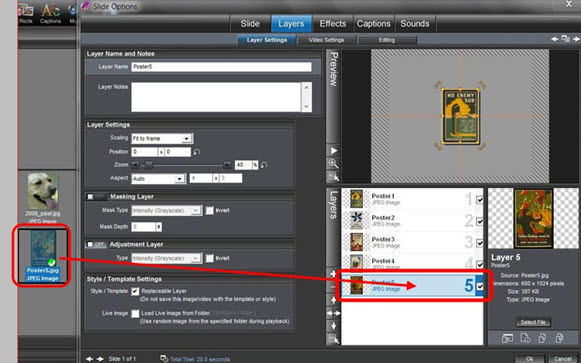
As a result, you will have 5 layers with 5 different posters. As an added benefit, all these also have the same keyframe format. To check this out select [Effects]> [Motion Effects] and click on the different layers.
Displaying Inactive layers
- To follow the lesson clearly, we need to see the inactive layers. Just click at the top right corner of the window and select the [Show Inactive Layers] checkbox.
Moving and zooming Posters
- Now the crux of the matter is to horizontally slide the posters along and enlarge them momentarily. We need to have an accurate design and thus, we do not drag them to their positions, but enter the exact coordinates.
Setting Keyframes 1 & 2
- Select [Layer 1] and select the area between [Keyframe 1 and 2] on the [Keyframe Timeline]. The 1st thing we do is to slide the posters along horizontally. These posters should be at equal distance of each other. We do this using the following settings: for [Keyframe 1] for [Layer 1], [Pan] = 30 x 0, for [Layer 2], [Pan] = 60 x 0, for [Layer 3], [Pan] = 90 x 0, for [Layer 4], [Pan] = 120 x 0, for [Layer 5], [Pan] = 150 x 0. Select [Keyframe 2] and for [Layer1], [Pan] = 0 x 0, for [Layer 2], [Pan] = 30 x 0, for [Layer 3], [Pan] = 60 x 0, for [Layer 4], [Pan] = 90 x 0, for [Layer 5], [Pan] = 120 x 0.
Here’s the image for the zone between [Keyframes 1 & 2] on [Layer 1].
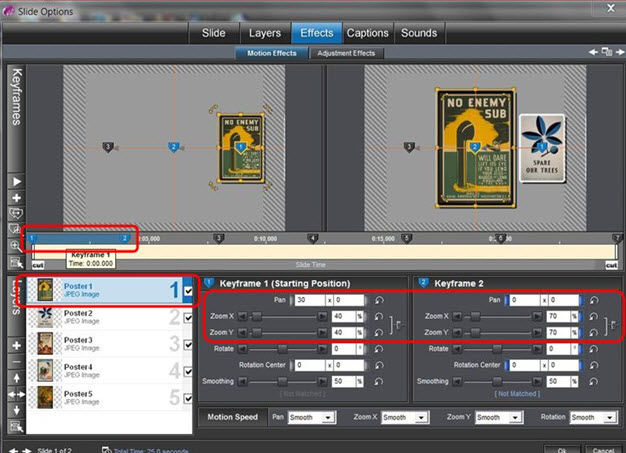
- Now we zoom into poster 1. The other posters are unchanged. To do this, on [Keyframe 2], we place the [Zoom] at 70%.
Setting Keyframe 3
- In order not to waste time specifying the settings all over again. for all layers, we copy the settings of [Keyframe 2] to [Keyframe 3]. We do this by clicking [Copy Motion Effects] and selecting [Copy Start to End (All Layers)].
- First, we set the zoom level on the right. The size of Poster 1 or [Layer 1] must be decreased, so in [Keyframe 3] set [Zoom] = 40% and in Poster 2, the [Layer 2] is to be increased, so set [Zoom] = 70%.
- Now, we need to change the position of the posters. For [Keyframe 3], for [layer 1], [Pan] = -30 x 0, for [Layer 2], [Pan] = 0 x 0, for [Layer 3], [Pan] = 30 x 0, for [Layer 4 ], [Pan] = 60 x 0, for [Layer 5], [Pan] = 90 x 0.
Setting Keyframe 4
- We select the zone between [Keyframes 3 and 4]. Once again, first we copy the [Keyframe 3] to [Keyframe 4] by selecting [Copy Start to End (All Layers)]. In this zone, all posters must move while reducing the size of [Poster2] and increasing the size of [Poster3].
We can do this by specifying the following settings for [Keyframe 4].
[Layer 1]: [Pan] = -60 x 0
[Layer 2]: [Pan] = -30 x 0, [Zoom] = 40%
[Layer 3]: [Pan] = 0 x 0, [Zoom] = 70%
[Layer 4]: [Pan] = 30 x 0
[Layer 5]: [Pan] = 60 x 0
Setting Keyframe 5
- We select the zone between [Keyframes 4 and 5]. Once again we first copy [Keyframe 4] to [Keyframe 5] using [Copy Start to End (All Layers)]. In this zone, once again all the posters are moved and at the same time, [Poster3] should be reduced in size and [Poster4] should be enlarged.
We do this by specifying the following settings for [Keyframe 5].
[Layer 1]: [Pan] = -90 x 0
[Layer 2]: [Pan] = -60 x 0
[Layer 3]: [Pan] =0 x -30, [Zoom] = 40%
[Layer 4]: [Pan] = 0 x 0, [Zoom] = 70%
[Layer 5]: [Pan] = 30 x 0
Setting Keyframe 6
- Now we select the zone between [Keyframes 5 and 6]. We first copy [Keyframe 5] to [Keyframe 6] using [Copy Start to End (All Layers)]. In this zone, once again all the posters are moved and at the same time, [Poster4] should be reduced in size and [Poster5] should be enlarged..
- We do this by specifying the following settings for [Keyframe 6].
- [Layer 1]: [Pan] = -120 x 0
- [Layer 2]: [Pan] = -90 x 0
- [Layer 3]: [Pan] =0 x -60
- [Layer 4]: [Pan] = -30 x 0, [Zoom] = 40%
- [Layer 5]: [Pan] = 0 x 0, [Zoom] = 70%
Setting Keyframe 7
- Finally, we select the zone between [Keyframes 6 and 7]. Once again , we first copy [Keyframe 6] to [Keyframe 7] [Copy Start to End (All Layers)]. Here, only [Poster5] should be decreased in size and the rest remain unchanged.
We do this by specifying the following settings for [Keyframe 7].
[Layer 1]: [Pan] = -150 x 0
[Layer 2]: [Pan] = -120 x 0
[Layer 3]: [Pan] = 0 x -90
[Layer 4]: [Pan] = -60 x 0
[Layer 5]: [Pan] = -30 x 0, [Zoom] = 40%.
If we play the show now, we get the desired effect.
Saving the Show
Save this project now. Click [File]> [Save As] and select the correct folder using the explorer and change the [Name] if necessary. Click [Save].
The use of a Template
Now, here we have created a complex effect which required a lot of editing. It is therefore advisable to save it.
If you save this [Template], you can view it later along with the other pictures.
How to create a Template
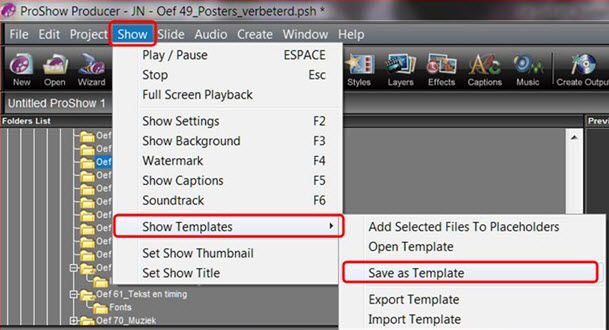
In the menu bar, under the [Show] button you have the [Show Template] option. When you select this you get the following option, [Save as Template].
You then get the following warning.
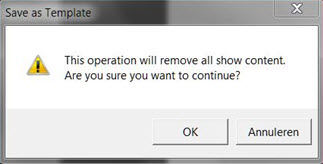
This warning, “This operation will remove all show contents. Are you sure you want to continue,” indicates that only the effects will be saved without the pictures. Click [OK]. You then get the following window.
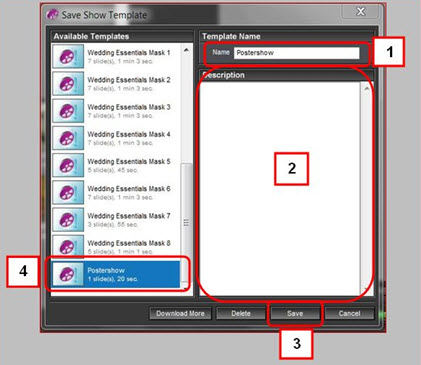
In this window, you need to give the [Template] a [Name] (1). If you want, you can add a description (2). You can then click on [Save] (3) and thus the template is stored in the list (4).
How to Load a Template
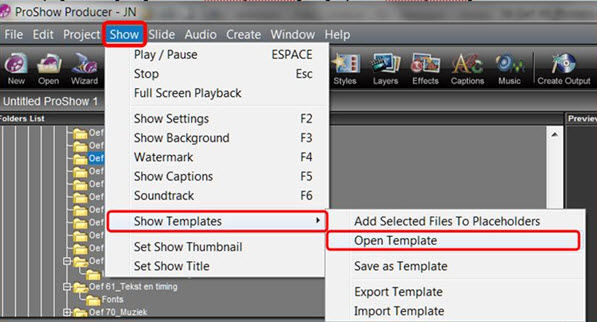
Click [Show]> [Show Templates]> [Open Template].
Select your [Template] from the following menu and click [Load].
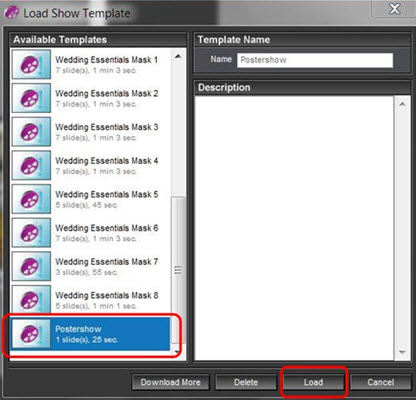
This displays the effects in the slide list without the photos.
Loading Photos in a template
Now you only need to place the pictures on the layers. Double-click the slide and select [Layers]> [Layer Settings]. Right click on a blank layer and select [Select File], and using the explorer, select your photo. Thus, you can fill all the layers with your photos and then you make full use of the effect, in your show.
Template management
Under [Show]> [Show Template], you can find other options that you can use to manage templates, including delete, import, export, etc…


